Category [/photography]
Quick tutorial to hopefully explain in simple terms the bits of a camera that can be
used to create better photos and give you a better understanding of what you camera does
when you set it to full auto or use a 'scene mode'. ![]()
From the first cameras with glass slides and a pinhole for a lens to the present high-tech cameras with 'digital film', not much has changed. The camera captures an image because the light in a scene is focused onto a light sensitive recording medium, that's all there is to it! Read on anyway as there's some other stuff that might be useful.
Anyone who's read any photography books will have seen an explanation of the relationship between shutter speed / aperture and depth of field. That's all I'm trying to do here. To start with I'll remove some of the technical words and use an analogy which may or may not help, you'll be the judge!
The Setup
Firstly we're going to ditch some of the terms, they're used a lot by those "in the know" but really they often serve to confuse newcomers. Today we're going to learn all about how to fill a bucket in a rainstorm. The picture below gives a basic layout and I'll include the names of corresponding camera bits and bobs so you can later see how they fit in. (You'll notice I'm not a professional artist!).

Bit's Explained
-
Rain (light): Sometimes a downpour and sometimes just a shower, light falls like rain
into our camera.
-
Opening (aperture): The wider the top of the bucket the more rain you'll get, the aperture is just a hole that you can make bigger or smaller.
-
Lid (shutter): You need to open the lid of the bucket to let the rain in, once you've got the required amount of rain you close the lid. A shutter is just the same, a device that opens to let in light and closes afterward, usually in a very short space of time.
-
Rain Gauge (film/sensor): The amount of rain collected, be it film or digital the amount of light collected results in the captured image being correctly exposed or the image is too bright or too dark (over or under exposed).
-
Collected Rain (exposed image): The rain captured in the bucket is similar to the impression left on the film.
-
Bucket (camera): Well ok it's not quite the same as a camera, there's no lens for a start but we don't generally try to focus rain and really most people understand that a lens
is used to focus light

Collecting Just The Right Amount Of Rain
As you can see from our bucket setup in order to collect the right amount of rain we've got a few choices.
There's a strict relationship between how long we leave the lid off (length of time the shutter is open), versus how big the opening is in the bucket (size of aperture), versus how heavily the rain is falling (amount of light coming from the scene). All these things contribute to the amount of collected rainwater (exposed image).
The exact same thing is true for a camera, any given scene contains a certain amount of light. To get the correct amount of light to accurately record the image you have choices; the longer the shutter (lid) is open then smaller the aperture (opening) has to be. If the aperture (opening) is larger we'd need to keep the shutter (lid) open for less time.
Both film and digital sensors are finicky, they require a very specific amount of light to give a correctly exposed image. We've all taken pictures where everything is over exposed or 'blown out' because too much light was let into the camera. Shots where not enough light was allowed inside are under exposed and overall look dark. By fiddling around with the aperture and shutter settings we are controlling the amount of light that hits the film or sensor.
Why Care About The Trade Off Between Shutter and Aperture
For a lot of pictures it really doesn't matter a great deal but there are subtle differences between correctly exposed images taken with a large or wide aperture and fast shutter versus those taken on a slower shutter with smaller aperture.
Aperture
A good way to understand different aperture sizes is to think of a pinhole camera, instead of a lens there's just a very small hole, it's actually the hole alone that focuses the light. A pinhole camera wouldn't work properly with a 1" hole in the front (plus it wouldn't be called a pinhole camera).
Another example (if you don't have 20/20 vision) is to press your thumb and index finger together an imagine it's a birds beak, now do the same on the other hand and make the beaks touch. There should now be a very small hole between, remove your glasses and look through the hole and you'll see things come into focus, the smaller the hole the more in focus the scene will become.
Therefore to increase the focusing ability of the lens use a very small aperture, both near and far objects will be in focus and things will appear sharp. Small apertures are good for landscape shots, that near hedge and the far away hills will both retain their detail and be sharp.
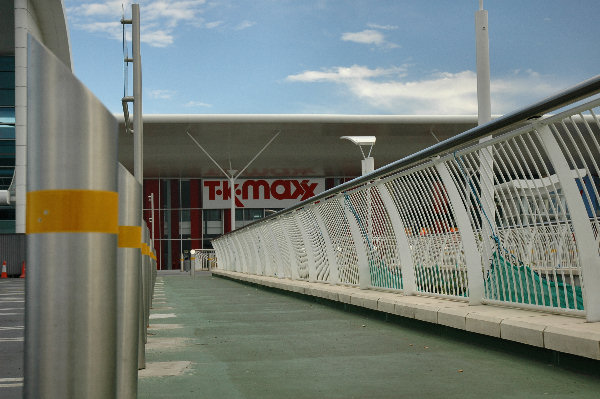
Example image which makes use of a small aperture (and wide angle lens) to keep the foreground and background in focus.

To reduce the focusing ability of the lens use a large aperture, this is really good for portraits of people, focus on the persons face and the background will be thrown out of focus and appear blurred, that way the background won't detract from the main subject.
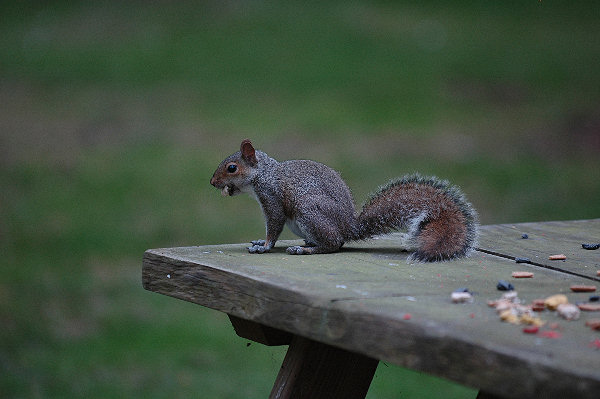
Example image which makes use of a large or wider aperture (and a telephoto or zoom lens) to deliberately blur the background.

The technical term for the distance between the nearest and furthest in-focus objects is "depth of field", the larger the depth of field the more of the scene will be sharp. A smaller or more shallow depth of field would mean less of the scene was in sharp focus.
One thing that can cause confusion is that a large or wide aperture is known as a "low fstop" (like f2.8). A "high fstop" (like f22) is a small aperture. The higher the fstop the smaller the aperture hole becomes letting in less light and allowing more of the scene to be in focus.
Shutter Speed
There are times when you can get better results by paying attention to the shutter speed rather than thinking too much about the aperture.
The shutter flicks open to let in light and flicks shut again to stop the light getting to the film, typically this happens in the blink of an eye. It's normally the opening and closing of the shutter that makes the familiar 'click' sound when a picture is taken. Shutter speed is often quoted in fractions of a second, like 1/250 or 1/500, the lower the number on the bottom the more time the film or sensor is exposed to light.
The longer the film is exposed to light the more chance there is for the scene to change whilst the camera records it. This can be put to good effect, for example, using a slow shutter speed to pan with a moving runner allows the background to blur and the runner to remain in focus (this takes some practice!).
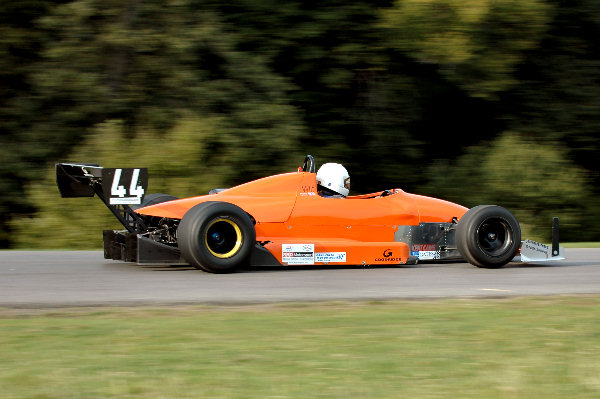
Example image which makes use of a slow shutter speed to introduce motion blur and isolate the subject by panning the camera with the moving car as the shutter is released.

A fast shutter speed is good for freezing the action, a sports car or other fast moving subject and it's background can be kept sharp by making the camera take the picture quickly, only giving it a short period to record the image.
More often than not it's reducing camera shake or movement blur that's needed. The longer the shutter remains open the more chance there is to accidently move the camera. Camera shake is probably one of the main reasons pictures turn out blurred. If you don't have much light to work with then steady the camera, keep your eye on the shutter speed to make sure it doesn't drop too low or try increasing the light in the scene by using a flash or getting your subject nearer the window.
Sensitivity To Light (ISO)
Not sure whether to include this or not, it doesn't fit well into the bucket analogy, if
anyone can work out a good way let me know! ![]()
Film or digital sensors are sensitive to light, that's how they record the image. The more sensitive the film the more easily light will develop the chemicals and it's the same principle with digital.
How light sensitive the film is is commonly referred to as the ISO rating, for example ISO100 film is half as sensitive to light as ISO200 film which in turn is half as sensitive as ISO400 film and so on. Typically for scenes where the lighting is low you would use more sensitive film to allow you to use a faster shutter speed and/or smaller aperture.
Todays digital cameras allow you to switch ISO at will, a higher ISO will allow a faster shutter and/or smaller aperture at the expense of some loss of image quality (digital noise) in a similar way that faster film tends to show more grain.
Other Stuff
There's always more to learn about photography from both technical and artistic viewpoints, whenever you go out to take pictures and try different things you'll be learning something new. Understanding how your particular camera works and understanding how cameras work in general will enable you to improve and produce higher quality images.
Hopefully this tutorial has helped shed light on the technical side of photo taking ![]()
You can find explanations for many more photographic terms at wikipedia:Photographic_terms
Please do check out the main photography website at @
Contemporary Wedding and Portrait Photography ![]()